
Treehouse!!!!!!!
Our kids are now 6, 3, and 3 and the small toddler playset wasn’t cutting it for them any longer. I’ve been wanting my husband to make a treehouse for the boys for some time now. When Covid shut the world down, we knew it was time to make one since we knew we wouldn’t be able to go to playgrounds (or anywhere) for a while. I drew a quick sketch of what I wanted and gave it to my husband to take over from there. I have to say, he is becoming pretty handy! He did this all by himself with zero help and without stepping into a store! I’ll share my pretty photos first with product links and let him share his process after that.


This is the space before! The treehouse is where all of those plastic toys are in this picture. And these wooden chairs also got a makeover this spring! See if you can spot them in this post — I painted them matte black and they now live in the back right corner of the yard (eventually to become a fire pit area).

My original drawing. We obviously nixed the extension on the left. We already have a swing elsewhere in the yard and didn’t feel it was necessary. We can always add on later if we feel we need to.

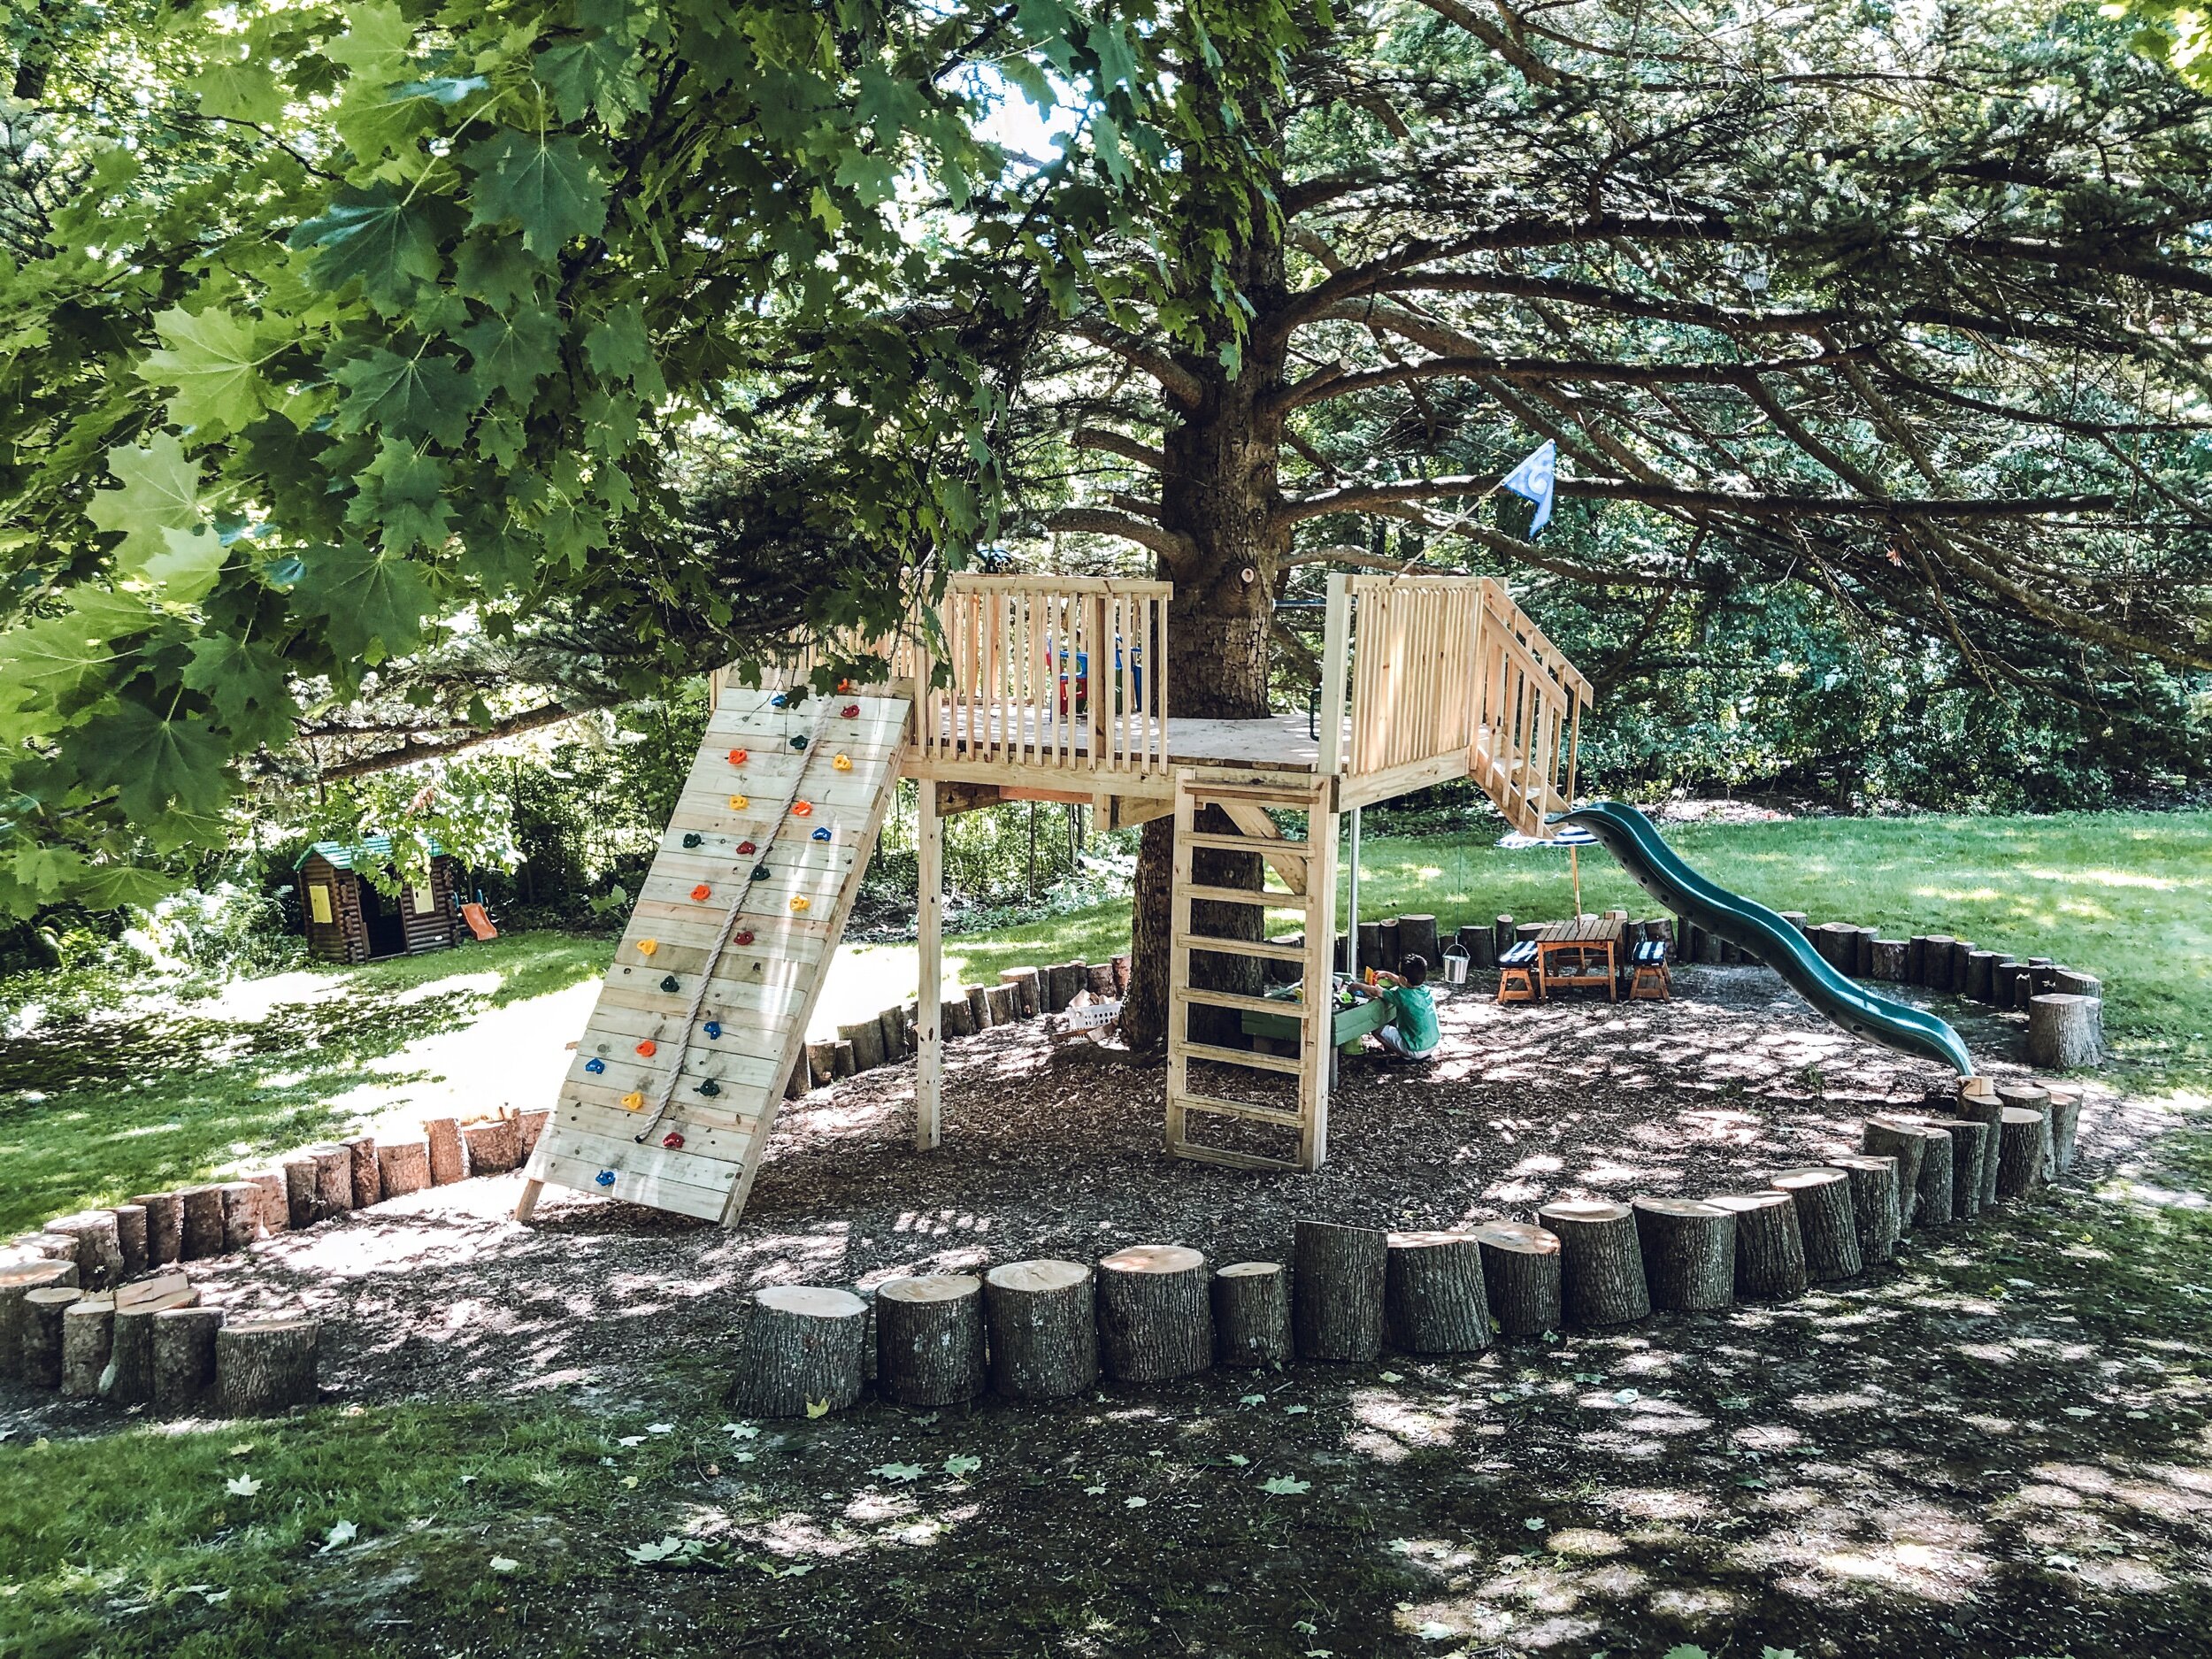
We just happened to have had several trees taken down as my husband was finishing the treehouse. We saved a ton of money by having the tree people “take the trees to the ground.” This means that they don’t take the brush or cut up any longs. Our neighbor is amazing and helped us all day moving brush to the curb and cutting the large logs with his chainsaw into smaller logs. Since the grass doesn’t grow well under the huge tree, we decided to put stumps around it to give it a clearly defined play area. After the stumps were ground, we moved the chipped wood under the tree. Can’t believe how well that worked out! Someone did warn me about having logs around the treehouse as that may attract termites, so if you do something similar, I’d look into that. We will research and add to this post as we learn more.
In this picture the logs are just placed on the ground, but we plan on digging a trench and setting them in the ground a bit more for safety. I also plan on adding some other elements into the circular space (balance beam? stepping stones? hammock?).

rock holds / rope / sand table (similar) / handles

binoculars (similar — ours are no longer available but were 1/2 the price) / chairs (similar)
My husband added a small step for the twins to be able to use the binoculars.


It would have been very easy to trim these low branches on the tree, but we decided to keep them and work around them to feel more like you are in the tree.

The boys love ducking under the branches; when they climb up the mountain they have to duck under this big one!

It cuts right across the tree platform. We decided we can always cut it later, but for now the kids love it.

I just love kids’ imaginations. They use the spots where the other branches have been cut as buttons and computers.


sand table (similar)
I do want to add some monkey bars under here at eventually.

One thing we did not agree on was the slide. I knew this was going to be a problem and tried to get us to order the slide first and build the treehouse from there. Many play slides are made for a 5’ deck. As I researched, I learned that if you are looking at the actual slide length, you want about double the height: a 5’ deck would warrant a 10’ slide, for example. Well, my husband decided to build the treehouse first and buy the slide last. The treehouse is on a pretty major hill. The lowest point from the ground is about 6.5’. We had a very hard time finding a slide that was the right height that did not cost over $800 and was in stock. I checked facebook marketplace daily (which is a great resource; a lot of people were getting rid of their old playsets and slides) but still couldn’t find what we needed. I ended up calling a local playset store and asked if they sold slides separately and they said they did and that they had one with a scuff mark they would sell me for 50% off! SOLD! We picked it up that day in the minivan for about $160 and I can’t even find the scuff mark! It is for a 5’ deck. After attempting to attach it to our 6.5’ deck and having the kids fly off if it (eye roll), he came up with this plan of adding a couple steps. I wasn’t sure about it, but it hasn’t been a problem. He still claims that he doesn’t regret building it shorter. He said he wants the kids to grow into the treehouse and didn’t want anything short.

swing (similar)
Can you spot the baby deer that live with us now!?


Hi, deer!

swing (similar)
The boys are already planning on adding a zip-line connecting the two trees!

I made sure to save all of the scrap wood to have a set of outdoor blocks. I wasn’t sure if the boys would play with them, but they do!


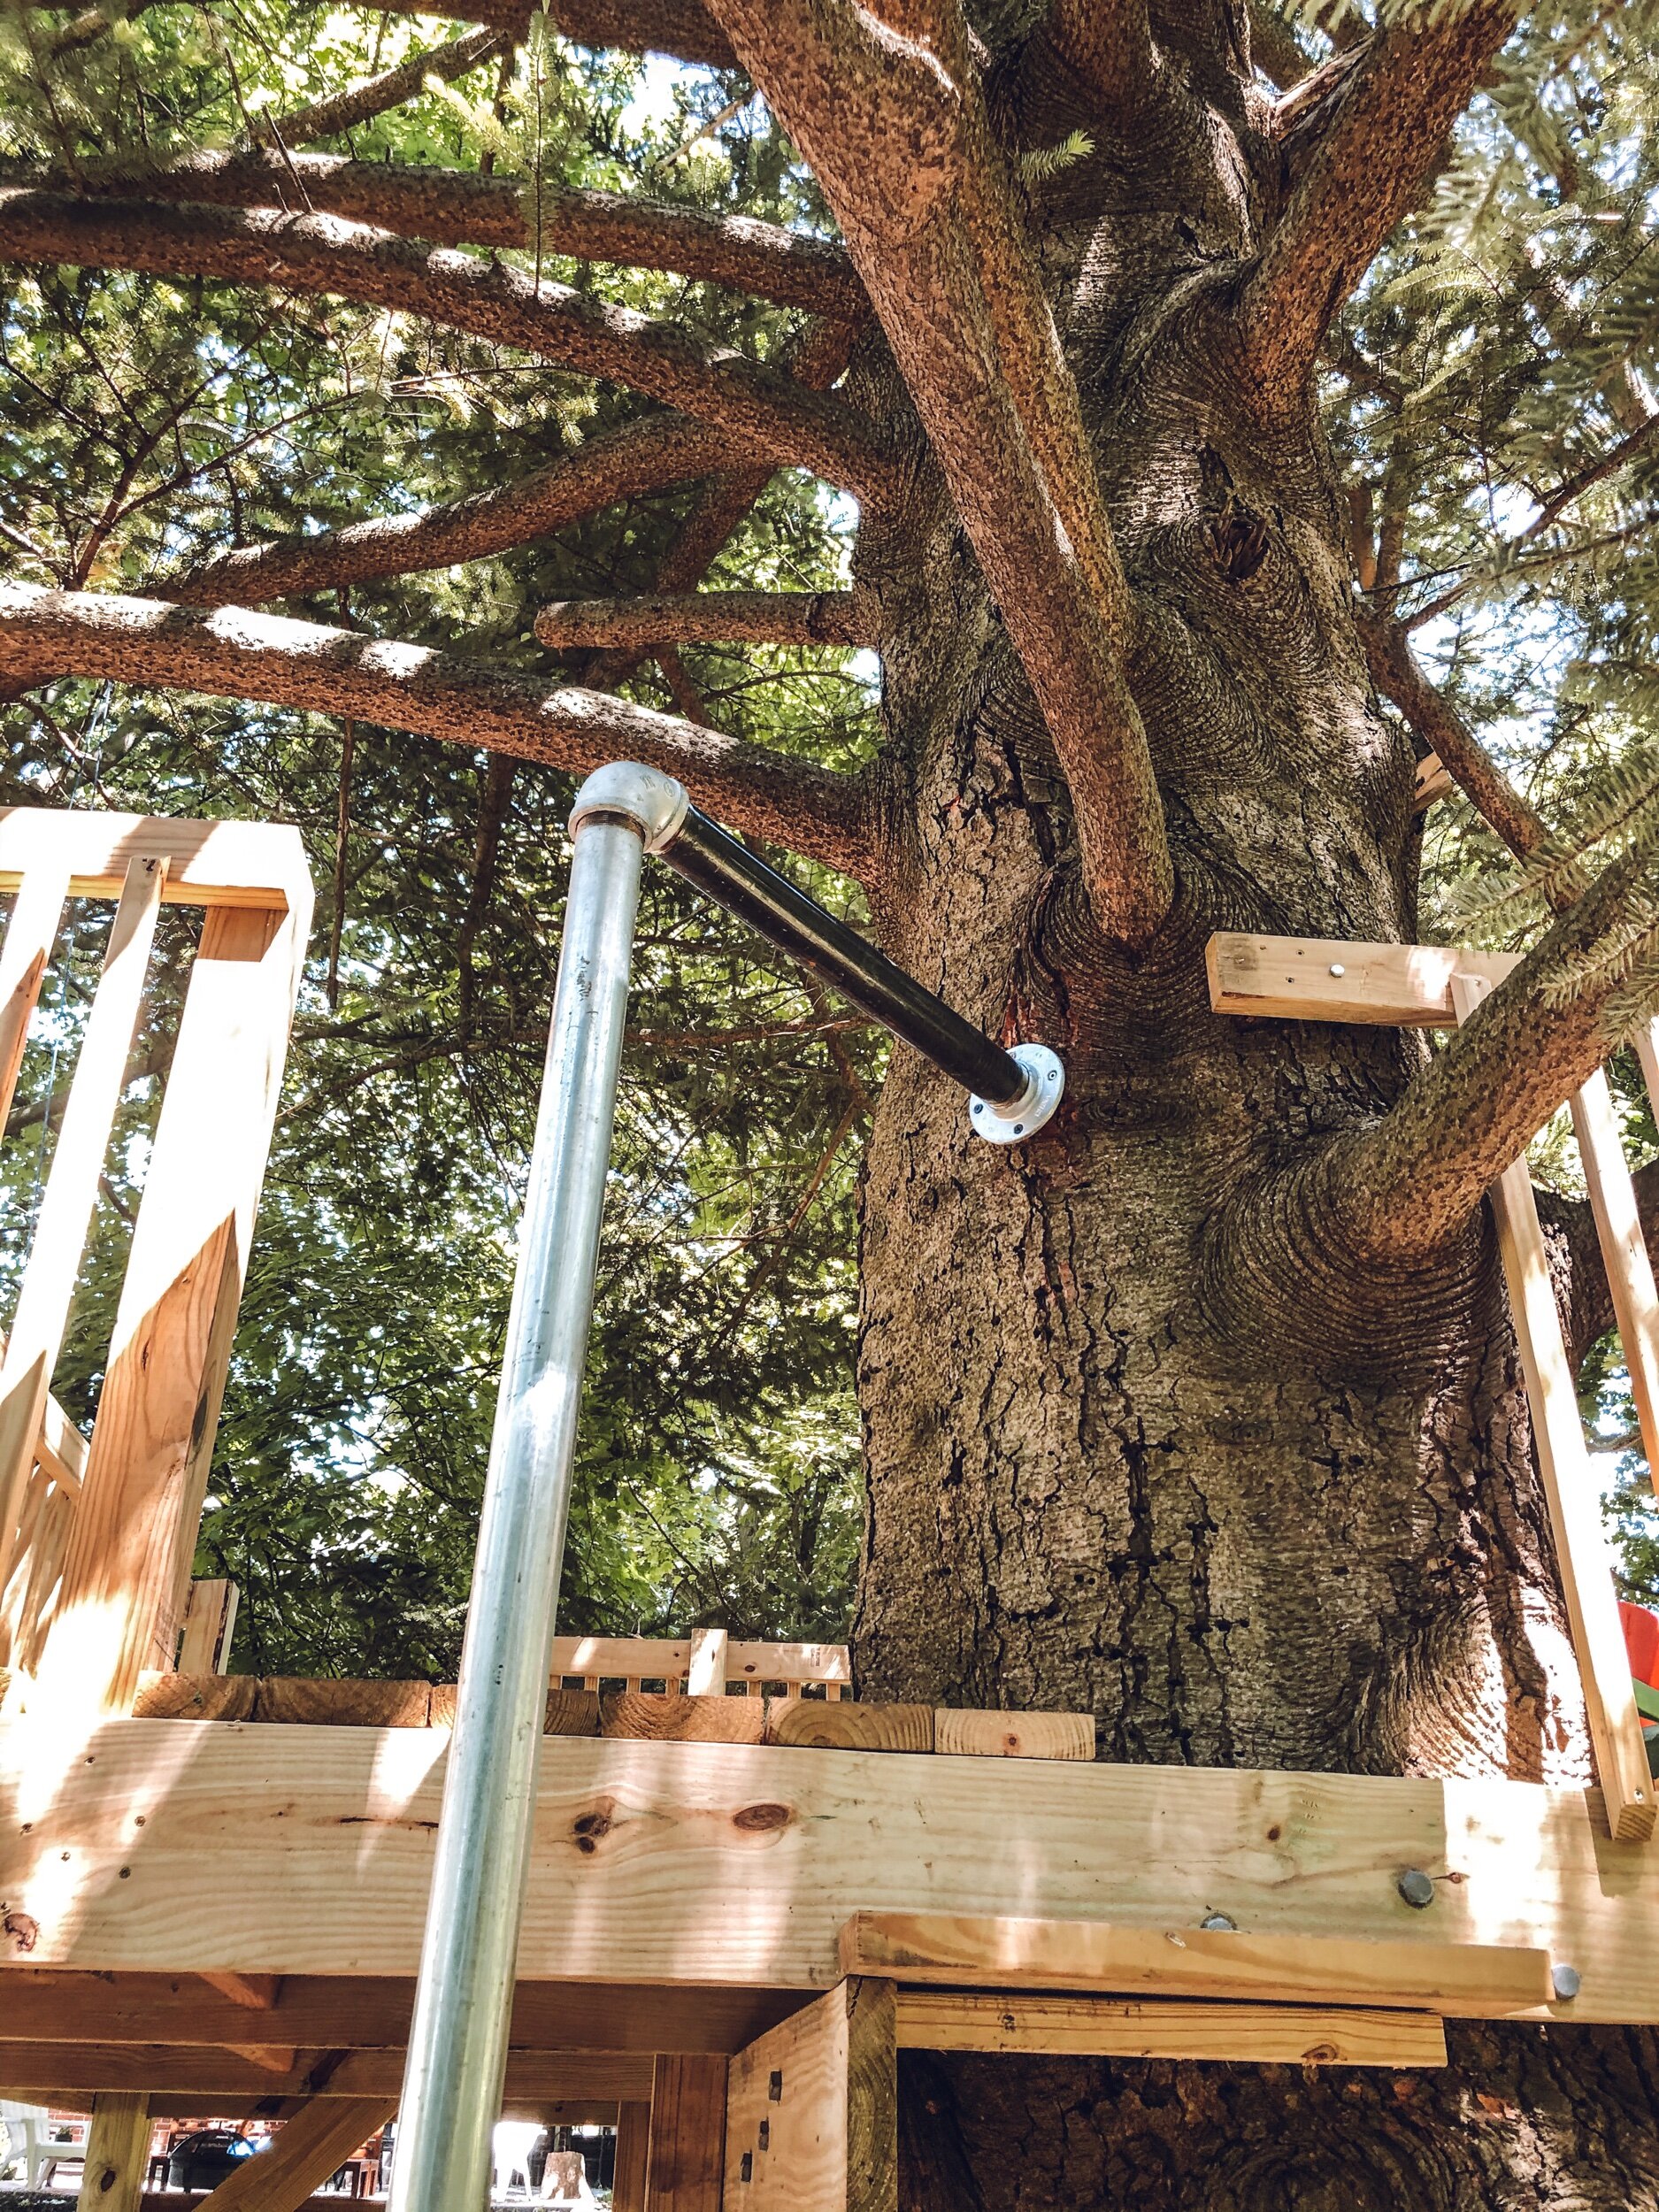
long pole / elbow / flange / small pole
The fireman pole also gave us some trouble with the height. After scouring the internet without success, I gently nudged my husband to make one out of pipes.

flag and bracket (purchased through same shop, message seller) / dowel rod

Product Links:
initial flag — message seller to add a bracket to your order as well. We drilled the flag into a dowel rod.
u-bolt for rock wall rope (size #536)
swing (similar)
sand table (similar)
binoculars (similar)
plastic chairs (similar)
handles (we only used 1 out of the 2. these may not be necessary)
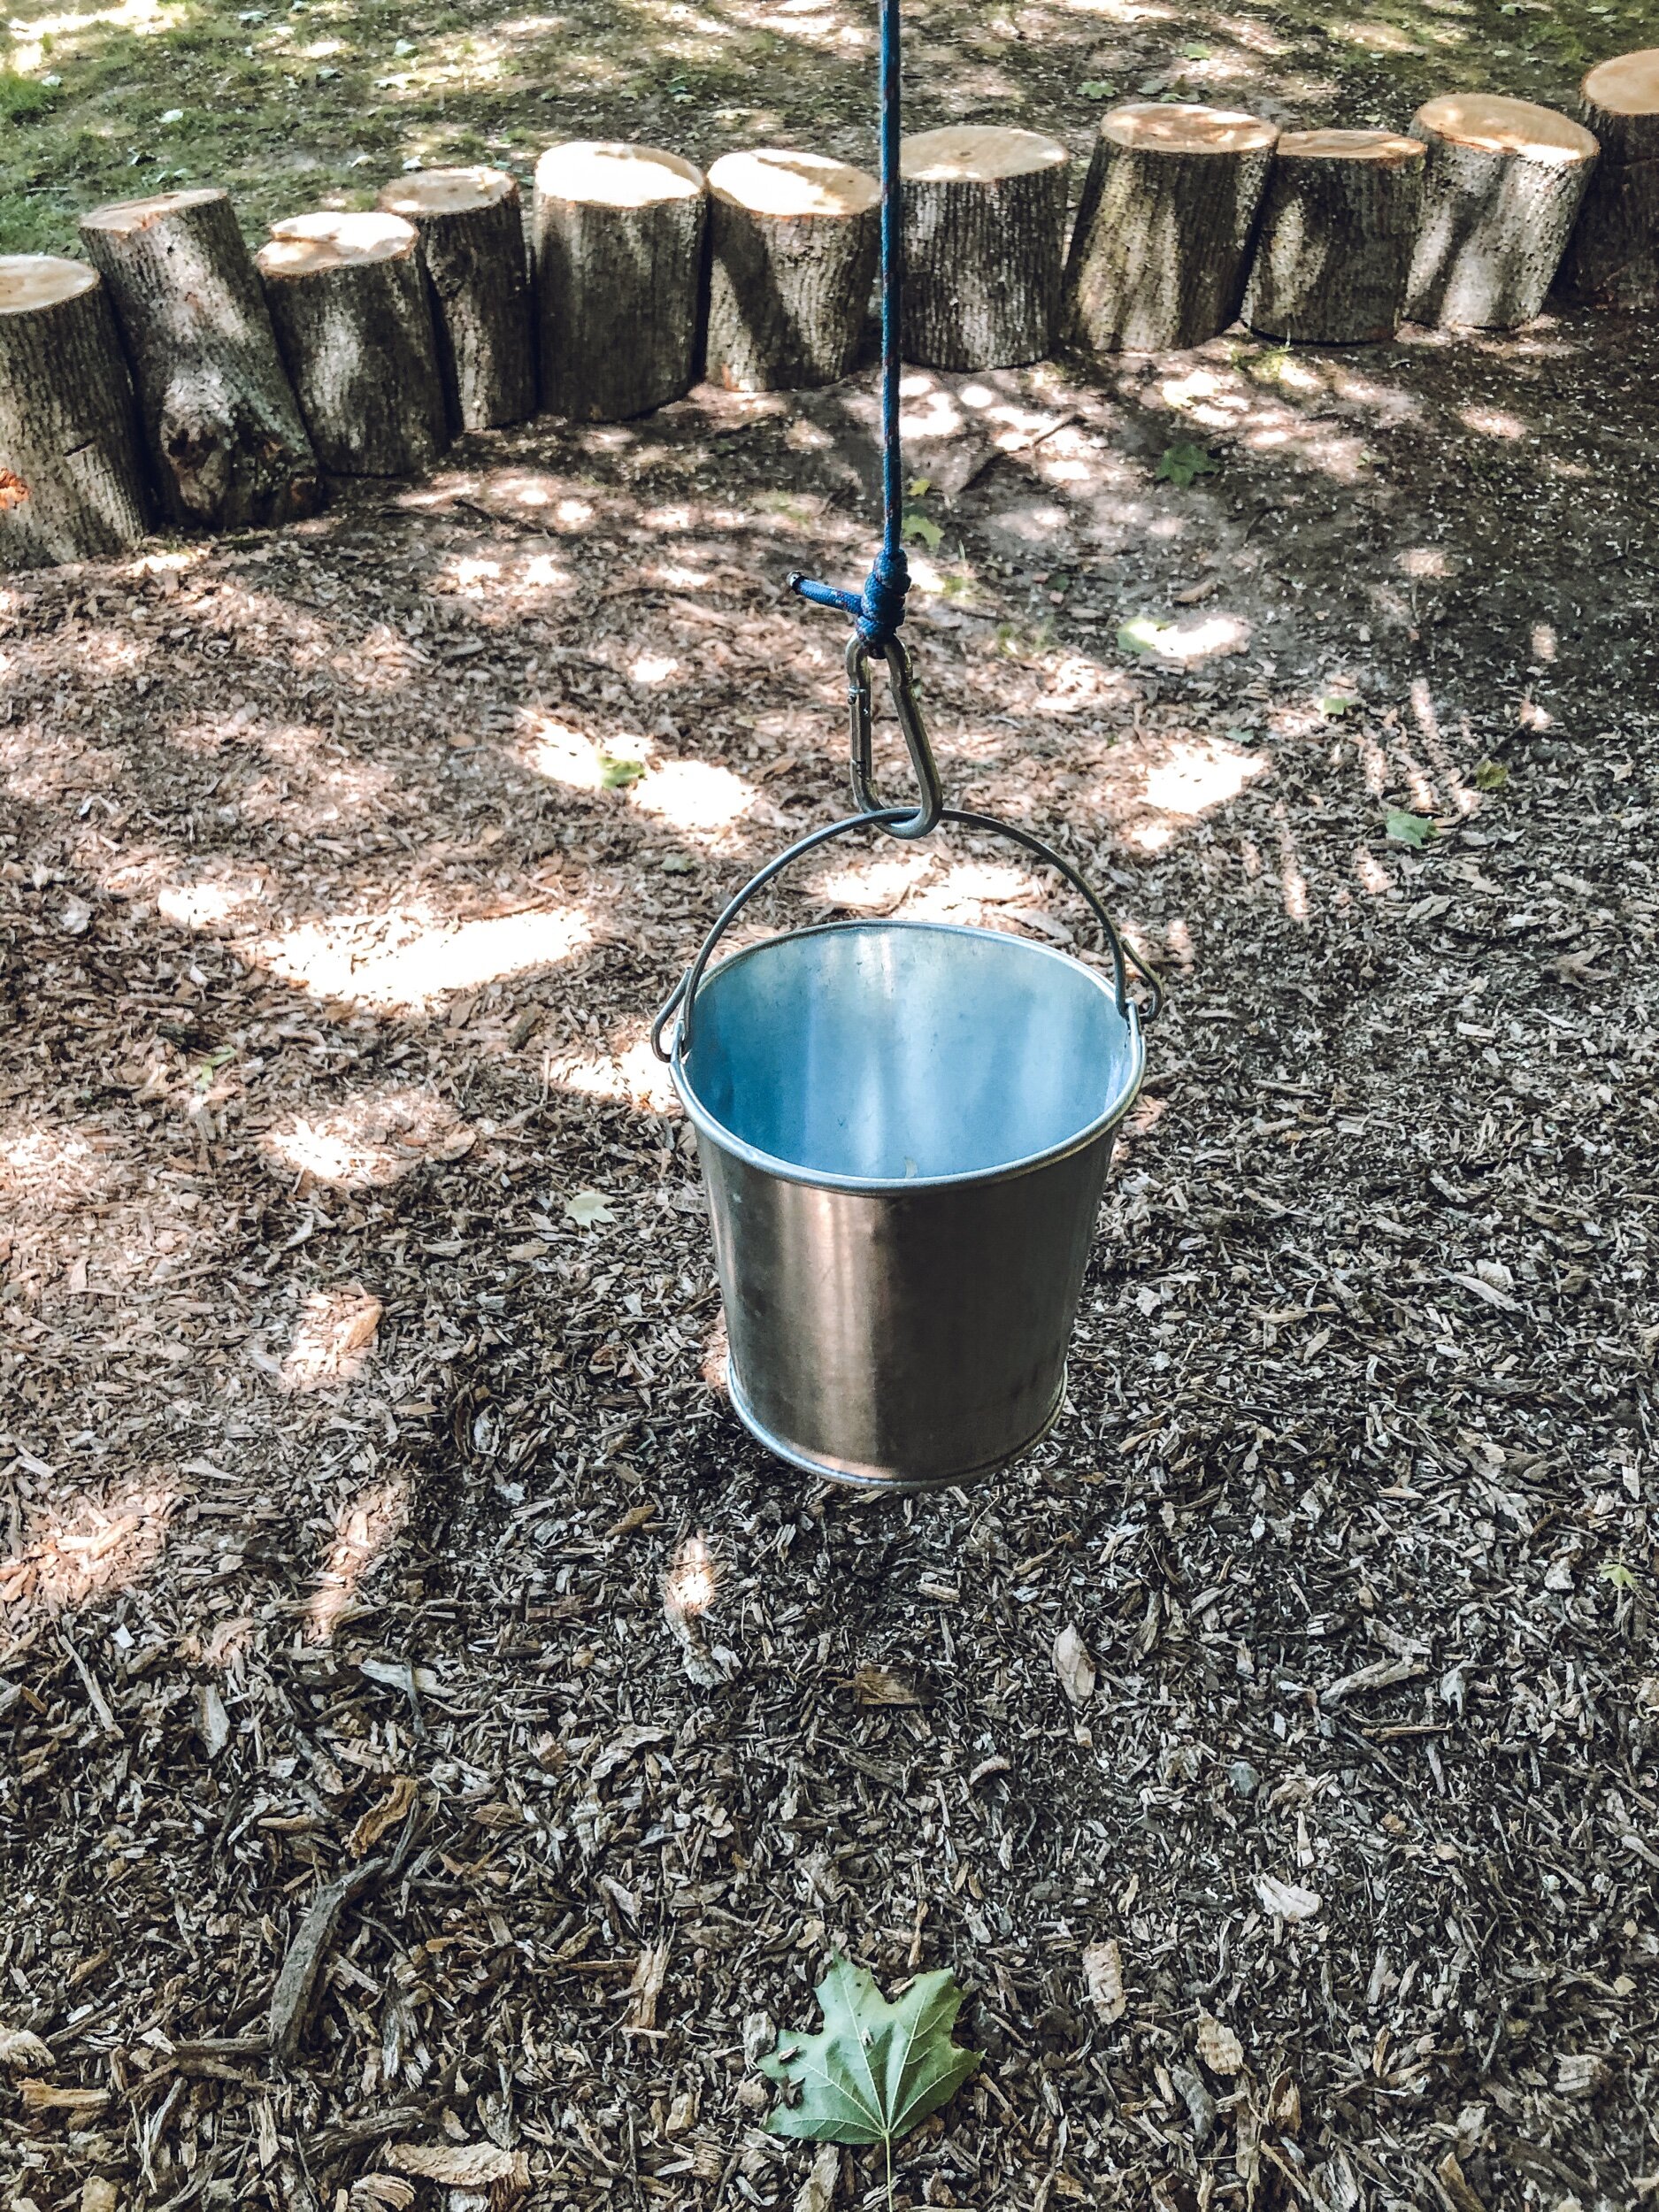
cleat (for pulley rope)
pulley rope (set of 4)
clip for pulley
fireman pole:
I’m now turning it over to my husband, Dean! Disclaimer — although he is an engineer, this treehouse was not “engineered.” We are sharing the process how we did this and are not suggesting this is how you should do a treehouse :)

Most of the screws I used were 2.5” long #8 wood screws with a driver head. I love the driver head and would not have done this project without them! I began by leveling and mounting some smaller pieces of wood along the tree (parallel to the ground). These helped support the larger 2”x8” pieces later on and were removed at the end. The height of the floor will be 16” above the top surface of this piece. The larger horizontal pieces of lumber are 2”x8”x10’ (pressure treated). They are the support for the base/frame. Toward one end of the 2”x8” I mounted a 2”x4” perpendicularly at roughly the height I needed it off the ground. I call this the “wife brace” as this replaced her unsteady hands. I then lifted this structure up utilizing the "wife brace” and placing the other end on the smaller supports in the tree. I loosed 1 of the screws on the “wife brace” and pivoted it out slightly to get the 2x8 level. Then I tacked it in place with some wood screws and followed up with three 5/8” lag screws (pre-drilling and a large wrench were required!!!). Repeat this process on both sides of the tree (two parallel 2x8’s). Remove the “wife braces” when pieces are secure in place.


I then added additional 2”x8”x12’ pieces on top of these large supports. This is what the floor boards will rest on.

I used a 2x4 as a straight edge to align the ends of the 2x8’s.

I overhung a large 2x4 at the ends of the frame to provide a lip. This allowed me to easily set the end pieces in place while I screwed them in.
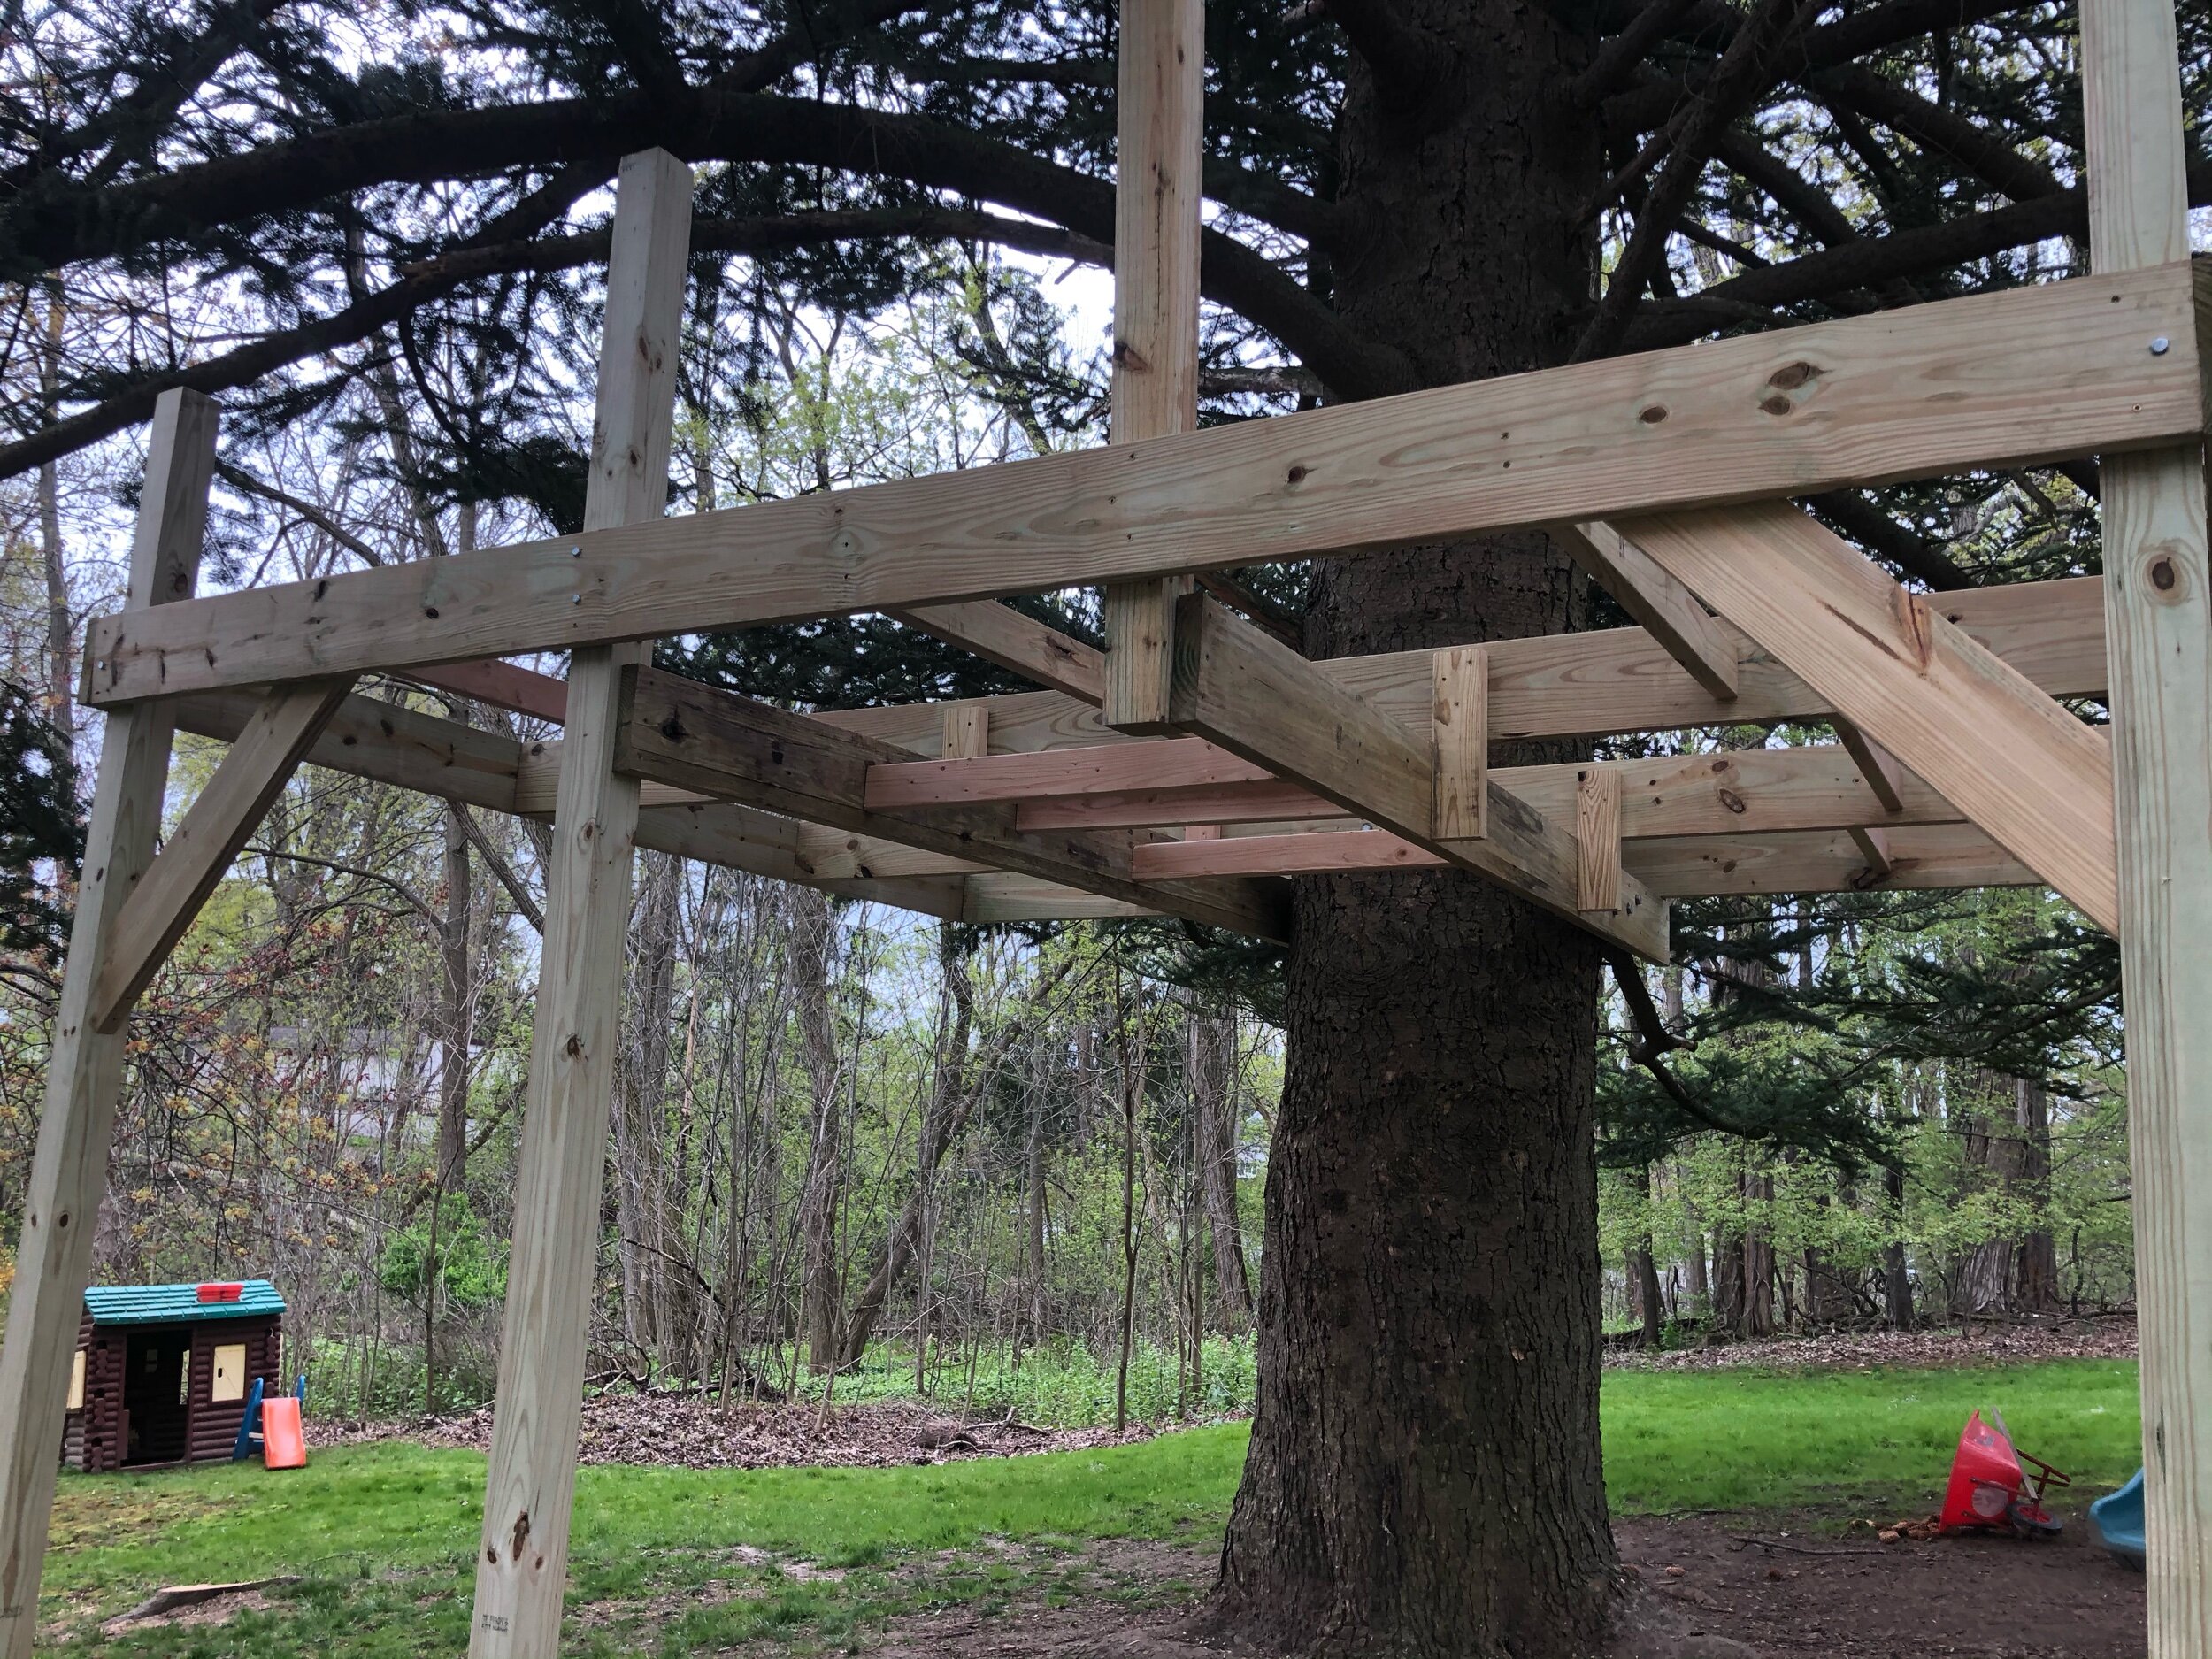
At the end not supported by the tree, I added three 4x4 posts to support the frame using 3/8” hex head screws. I dug small holes and added gravel where these posts sit in the ground. I felt the platform was mainly supported by the tree, otherwise more posts would be needed and they would need to be cemented into the ground. On the two ends, I put in angle pieces to prevent wobbling of the frame. This was only necessary in one direction. I also added some 2x4’s vertically to connect to the lower 2x8 pieces for extra stability where possible. More 2x4’s were added horizontally between the larger 2x8’s where to increase rigidity.

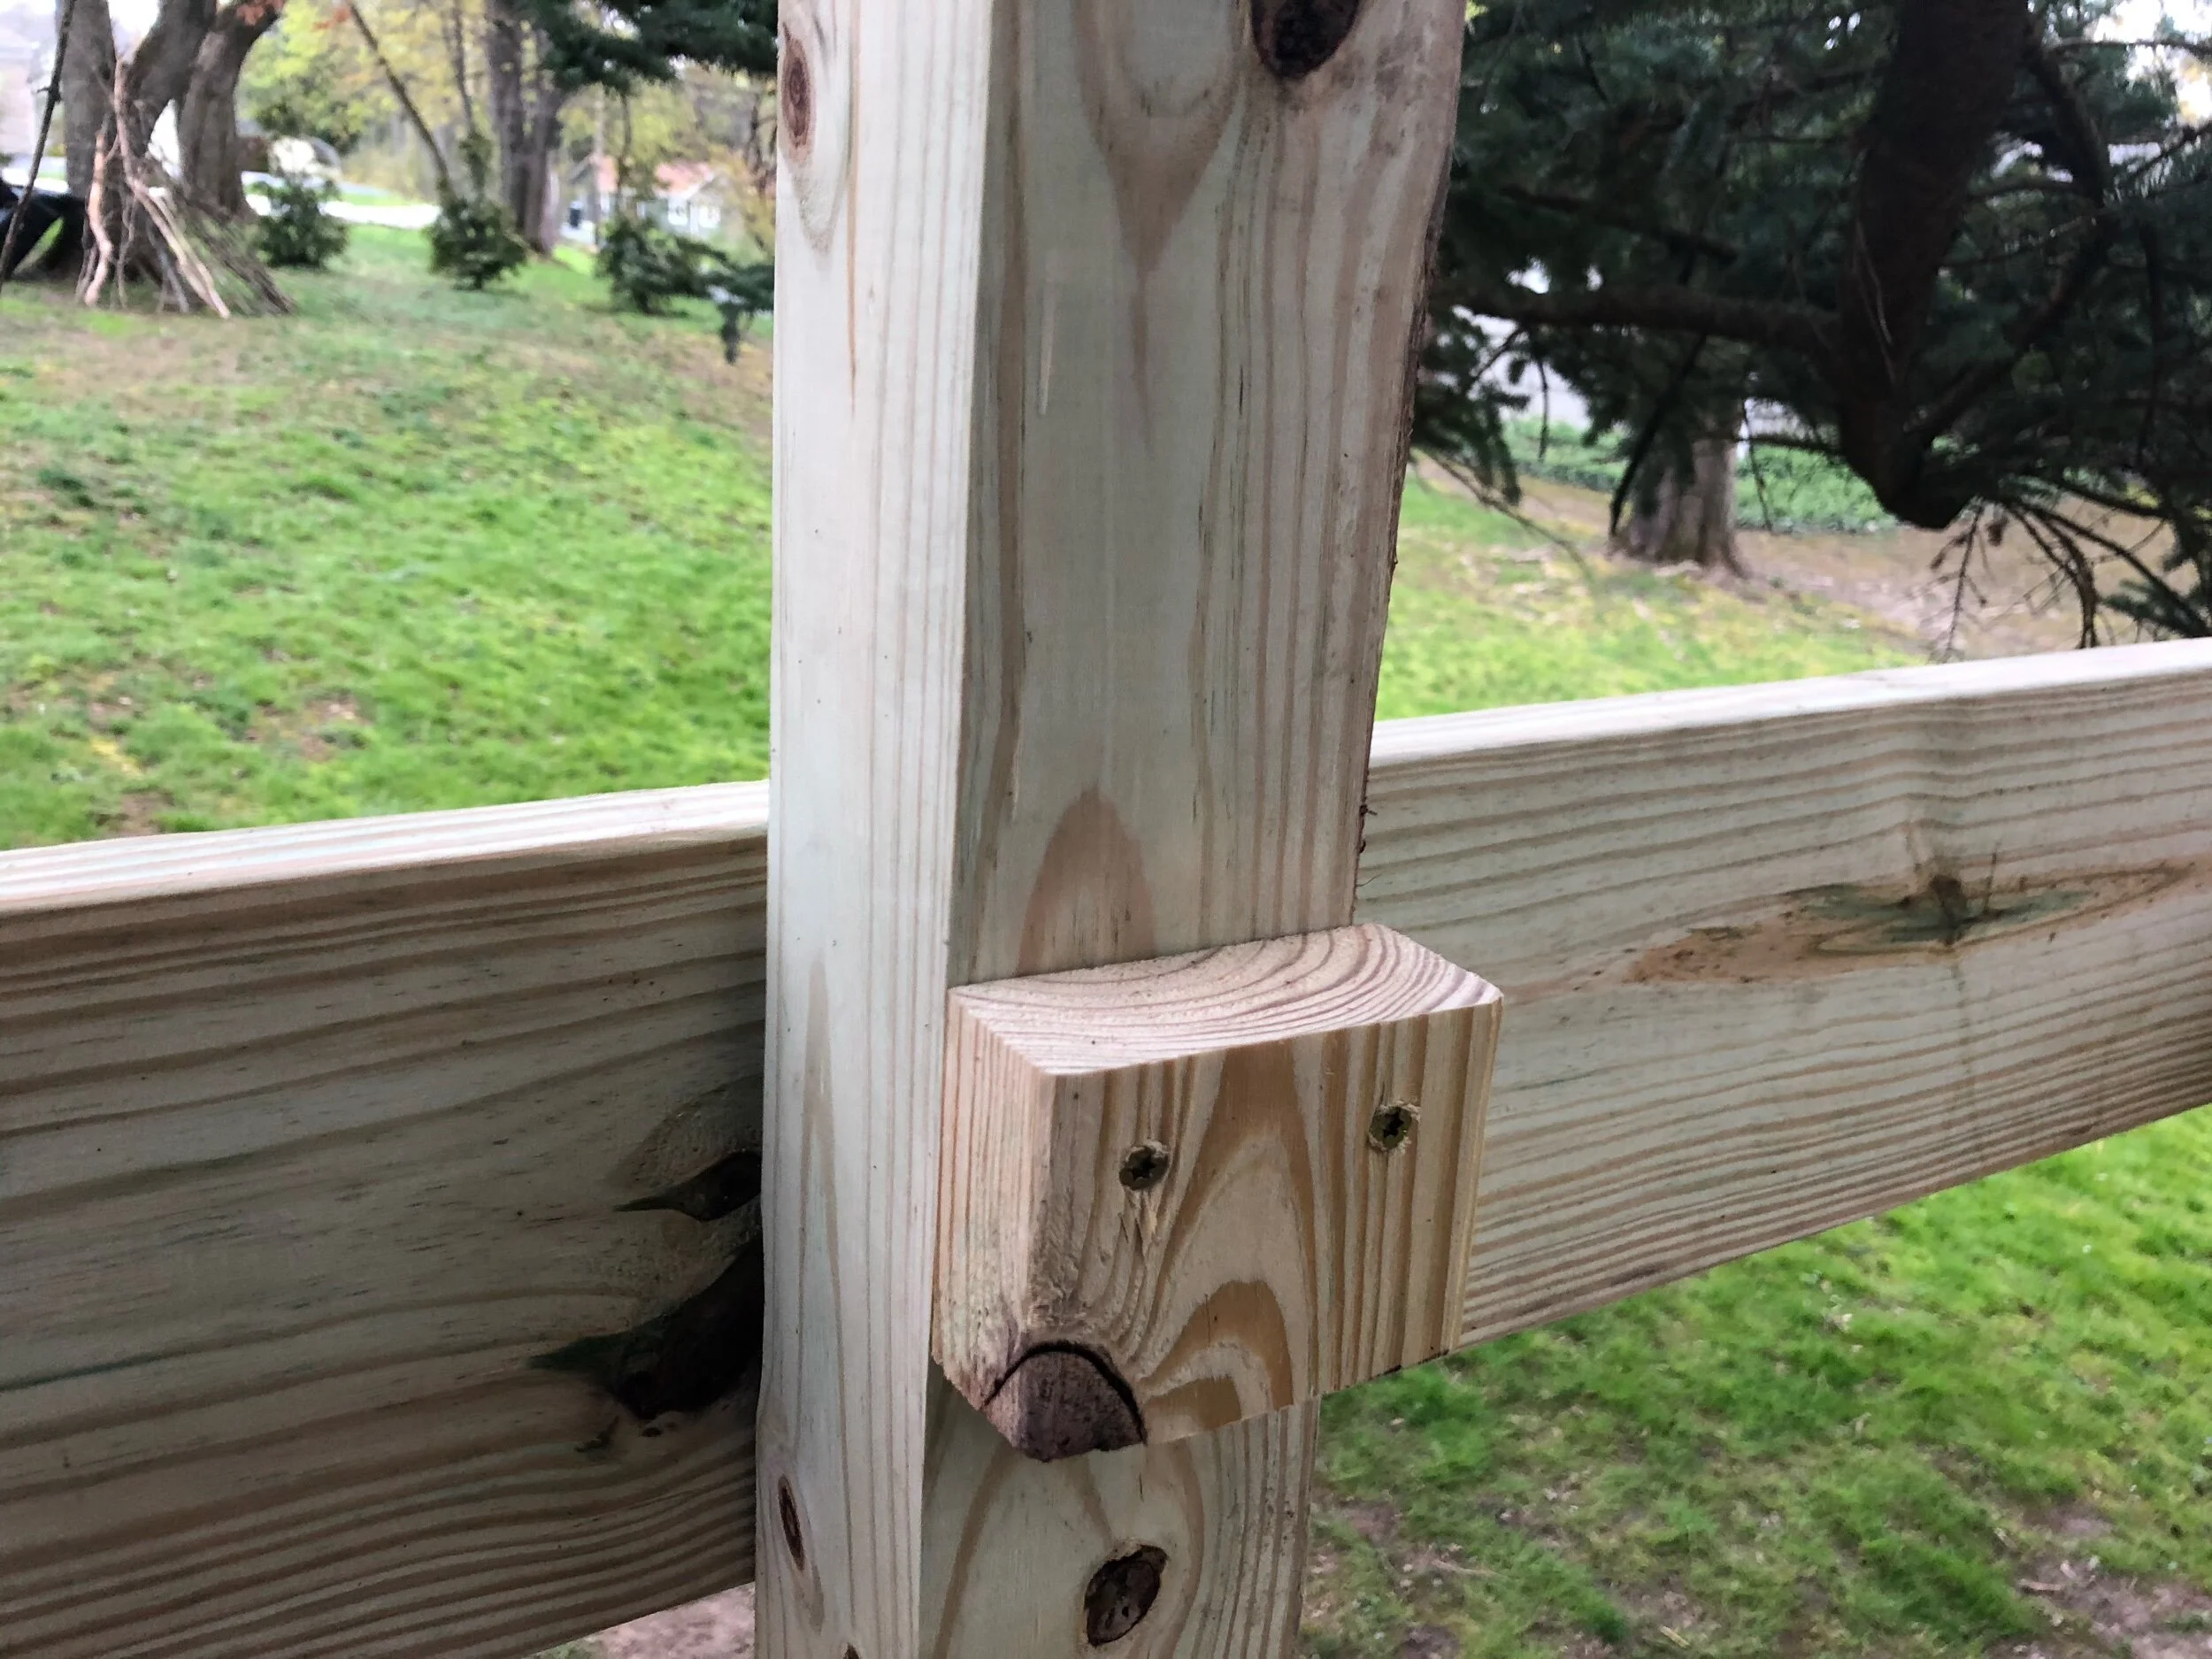
It was important to add these little blocks level with the top edge of the 2x8’s at the posts. These support the floor boards.


I laid out the whole floor before screwing anything in to make sure the spacing was correct. The floorboards are 2”x6”x10’ pieces and screwed into the framing. The platform is 10’ x 12’ so we did not have to cut most of these pieces. Where we did need to cut around the tree and posts, a jigsaw was very helpful.

We must have stopped taking pictures at this point (newbie bloggers!!) so a super quick rundown of the rest:
The ladder rungs are two deck rails cut to size and screwed in. Deck rails are also used for the railings around the platform. For the rock wall, I angled two 2x4s between the posts vertically at roughly a 30 degree angle. Because this is on a hill, I used one piece that was 10’ and one that was 12’ long. These were screwed to the 4x4 posts. I then cut a bunch of 2x6s down to about 4’ matching the lengths. These were laid on the angled supports and screwed in. The rock hold were screwed into these.
Would be happy to answer any questions you may have!
XO, K&D
*This post contains affiliate links. If you purchase something after clicking a link, I may receive a small commission at no extra cost to you. I appreciate your support!*